

These gluten-free chocolate pinecone truffles are a no bake holiday treat made with chocolate, cream cheese and slivered almonds. If you’re looking for a holiday treat that’s stunning to look at, delicious, and unbelievably easy, these pinecone truffles belong at your table. They look like they came straight out of a winter storybook, but they’re made with just a handful of simple ingredients and there’s no oven required or special skills needed.
These treats are rich, chocolatey, fudgy, and naturally gluten-free when made with certified gluten-free cookies. The cream cheese helps bind everything together while giving the filling that irresistible truffle texture. Finish with sliced almonds for the pinecone “scales,” dip in chocolate, chill, and you’re done. They’re guaranteed to get compliments (and disappear quickly).
Why You’ll Love This Recipe For Gluten Free Chocolate Pinecone Truffles
No baking required
Only a few ingredients
Kid-friendly and fun to decorate
Perfect for cookie swaps, parties, and gifting
Gluten-free and easy to customize
Ingredients You’ll Need
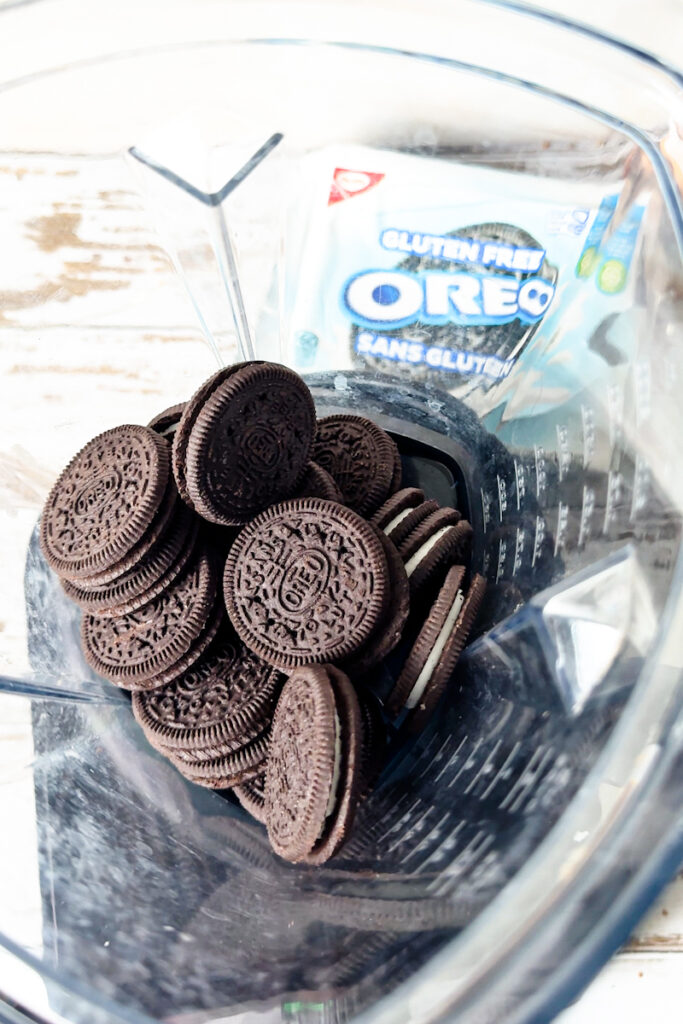
Gluten-free chocolate cookies (like gluten-free Oreos)
Cream cheese, softened (Philadelphia is gluten free)
Chocolate chips (Chipits brand is gf)
Coconut oil
Slivered almonds (just check the package and get raw, unsalted ones)
Step-by-Step For Gluten Free Chocolate Pinecone Truffles
Crush the Cookies – Add the gluten-free Oreos to a food processor and blend until they become fine crumbs.
Make the Filling – In a bowl, mix the cookie crumbs with softened cream cheese and melted chocolate until it becomes a dough-like texture.
Shape Gluten Free Chocolate Pinecone Truffles – Scoop about 3 tablespoons of the mixture and use your hands to form a pinecone shape.
Chill – Place the shapes on a parchment-lined tray and refrigerate for at least 30 minutes to firm up.
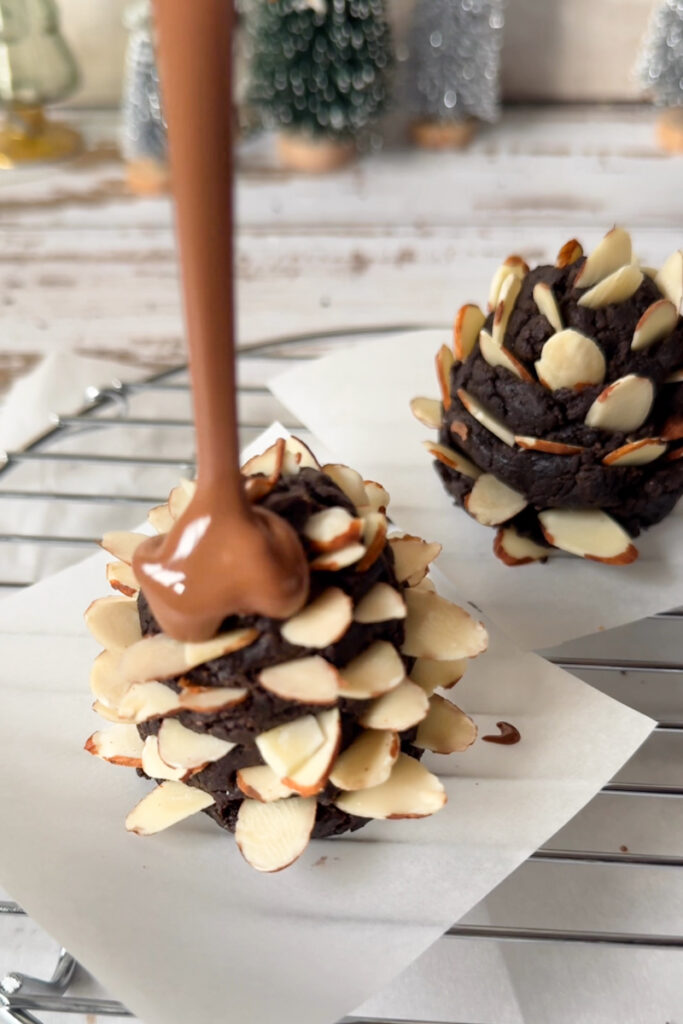
Decorate – Press slivered almonds around each pinecone to mimic scales. If they soften while working, pop them back in the fridge for a few minutes.
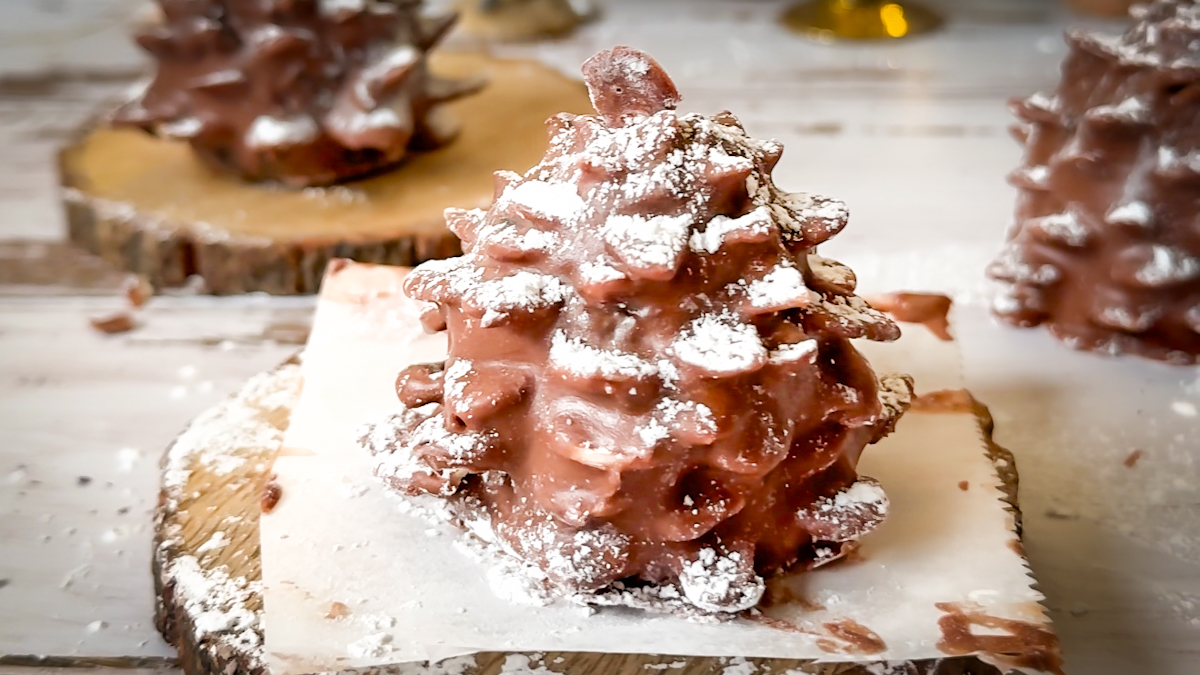
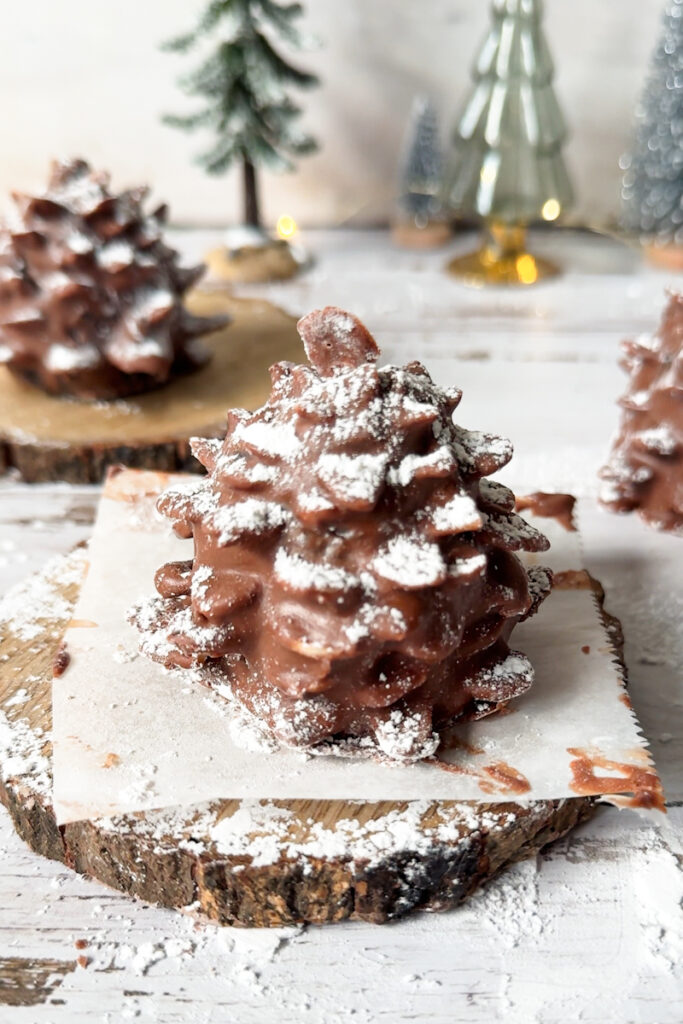
Dip in Chocolate – Melt chocolate and coconut oil until smooth. Coat each pinecone and return to the fridge until set.
Serve or Store – Keep in the refrigerator until ready to serve.
Tips for Success
If the mixture gets too soft to shape, chill it for 10–15 minutes.
Use gluten-free, certified nuts and chocolate to avoid cross-contamination.
Dust with powdered sugar for a snowy effect.
Serving Ideas
These no-bake pinecone truffles look beautiful on:
Hot chocolate boards
Holiday dessert tables
Cookie exchange trays
Teacher or neighbour gifts
They also pair perfectly with peppermint hot chocolate on a winters night.
Storage
Store these in an airtight container in the refrigerator for up to 5 days. They can also be frozen for up to 2 months. Just thaw in the fridge before serving.
Gluten-Free Chocolate Pinecone Truffles
Ingredients
- 100 g gluten-free Oreo cookies about 16 cookies
- 50 g softened cream cheese
- 50 g melted dark chocolate chips
- 1 bag slivered almonds
Topping
- 150 g dark chocolate chips
- 1-2 tbsp melted coconut oil
- Icing sugar for dusting
Instructions
- Place the gluten-free Oreo cookies in a food processor and blitz until they turn into fine crumbs.
- In a medium mixing bowl, combine the cookie crumbs, softened cream cheese, and chocolate. Mix thoroughly until the mixture forms a dough-like consistency.
- Take a 3 tablespoon cookie scoop of the mixture and shape it into pine cone shapes.
- Place the cones on a tray lined with parchment paper and chill in the refrigerator for at least 30 minutes to firm up.
- Place the chocolate chips in a microwave-safe bowl and add the coconut oil. Microwave in 20-30 second intervals, stirring after each interval, until the chocolate is smooth and fully melted. Start with 1 tablespoon of coconut oil and use more if needed for a smooth and creamy texture.
- Take an almond sliver and starting from the bottom of the brownie, press an almond into the brownie to create the look of a pinecone scale. Continue around the brownie until you reach the top. Rechill if they become too warm and soft.
- Coat the pine cones in the melted chocolate.
- Place the decorated cones in the refrigerator for 15-20 minutes or until the chocolate is firm.
Be the first to comment