

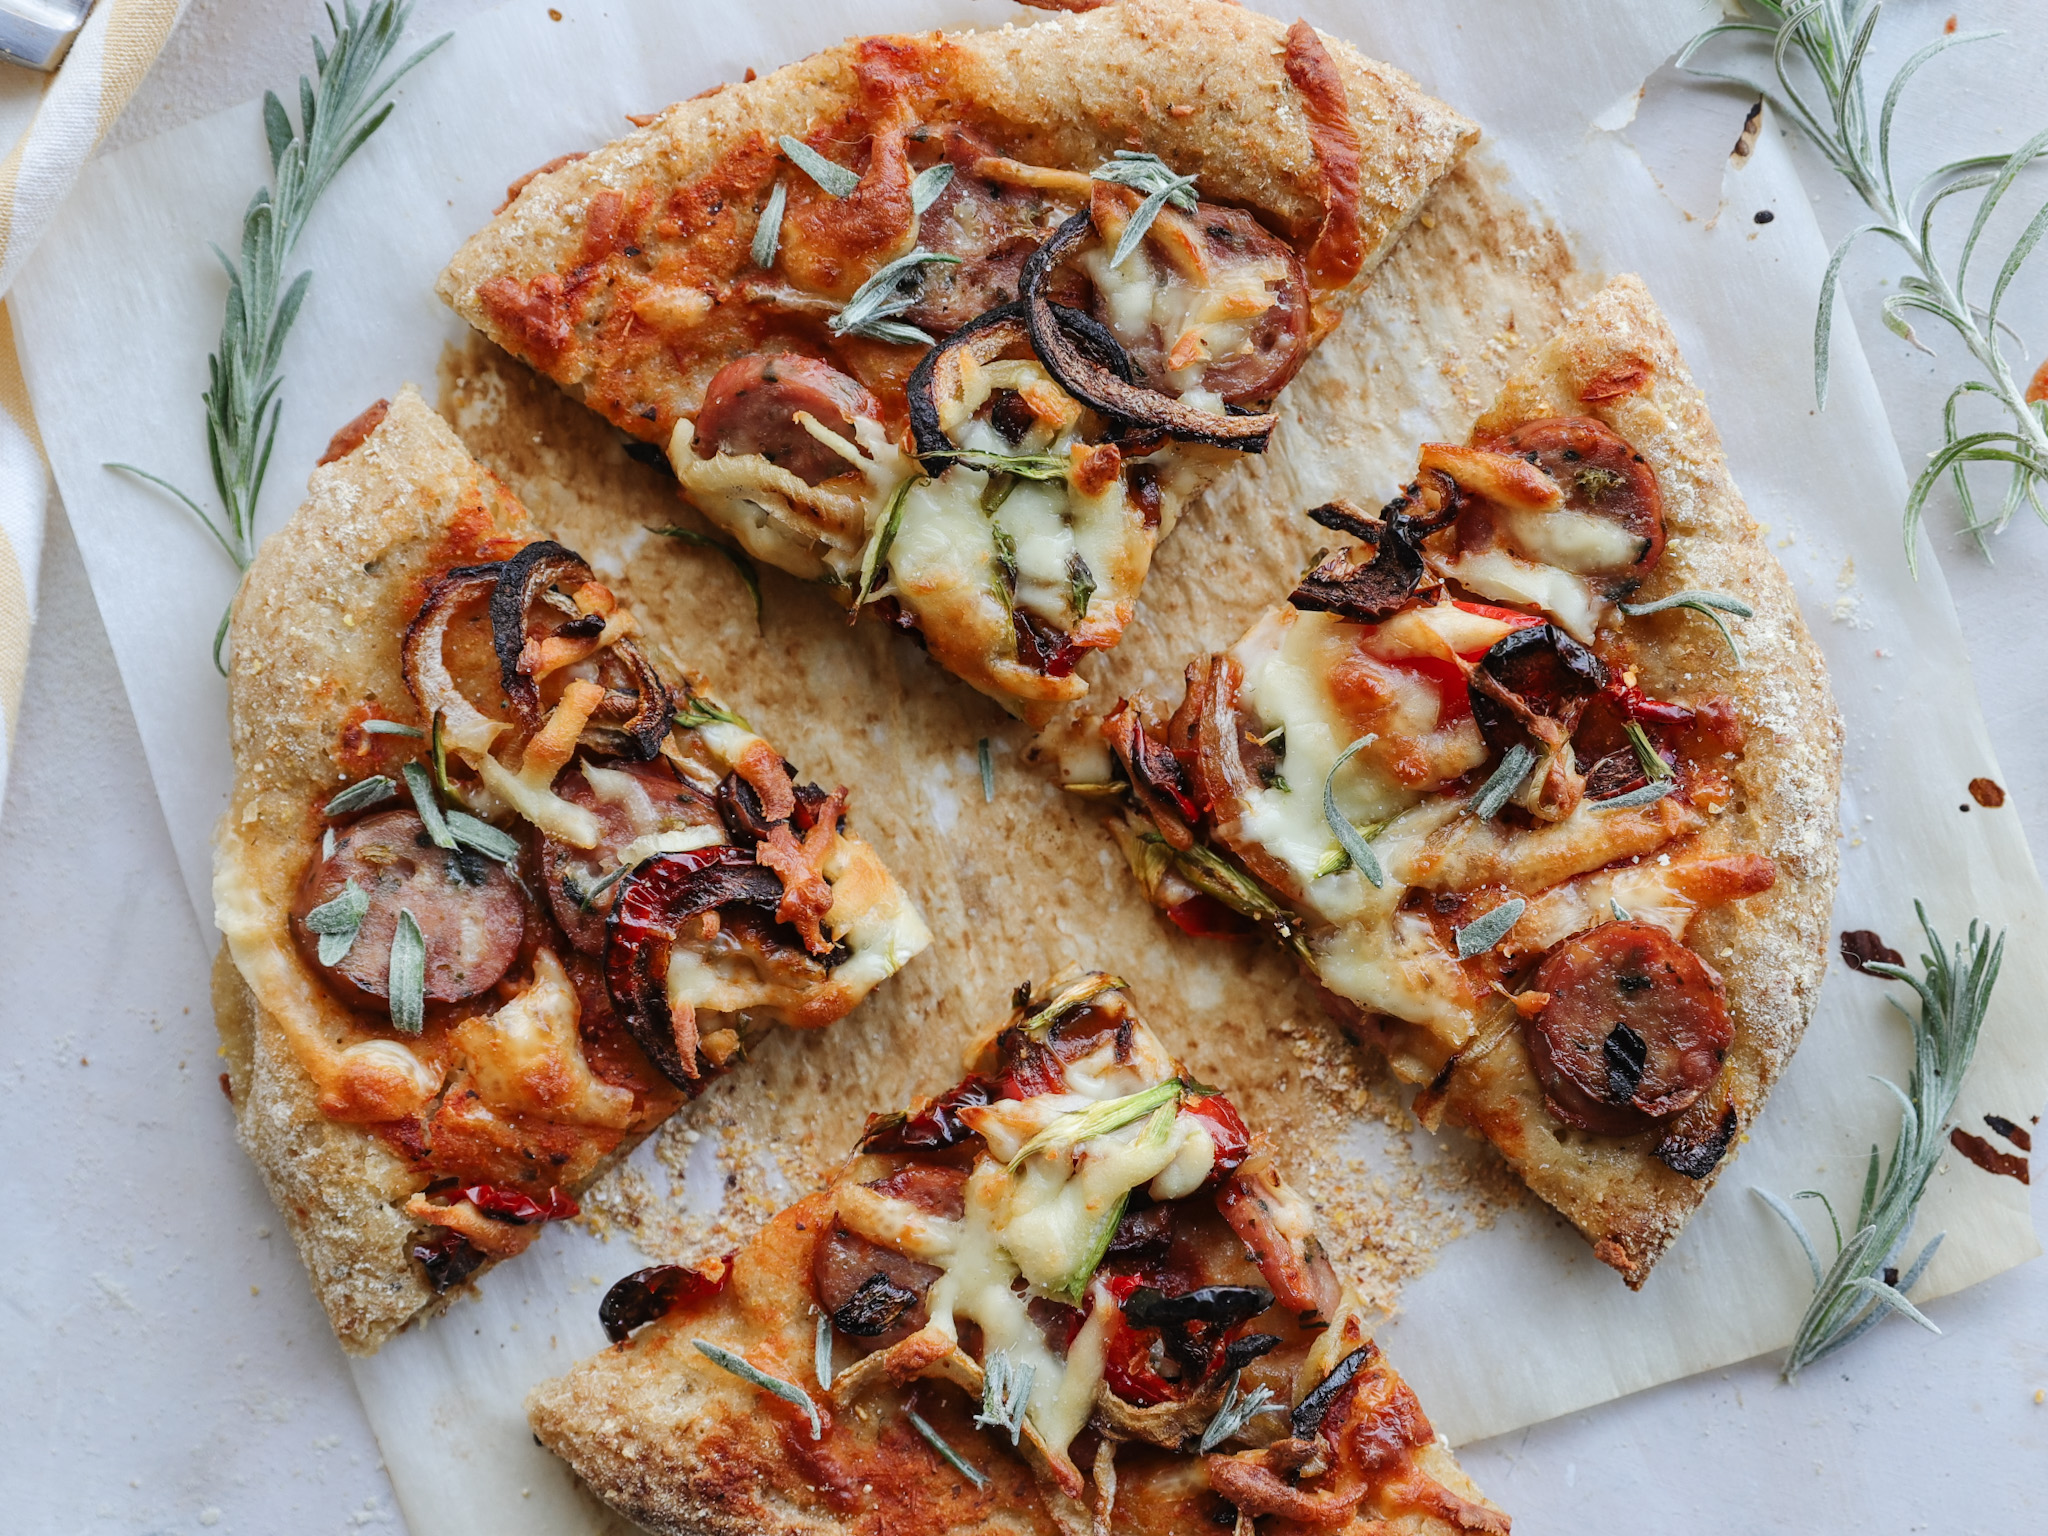
Gluten free pizza crust that is naturally leavened and made with my own combination of gluten free flour to create the perfect crust. This is a recipe that makes two 8 to 10-inch pizzas, depending upon your preference for a thick or thin crust. It is crisp, light and slightly chewy crust with an amazing rise. Many pizza crust experiments have led to this … my most favourite pizza crust to date. I know you will love it!
Make this pizza crust with fresh starter or with leftover sourdough discard
A FEW TIPS
Feed the starter first thing in the morning, make the levain and mix the dough by mid afternoon. To make life simpler, this can be an easy overnight dough as well. Cover the pizza dough and place it in the fridge for a day or two, which makes very little work the day of baking. Just remember that it is necessary to give the dough enough time to rise after being in the fridge.
The rising time of the dough is dependent upon the temperature in your house. On a warm sunny day the dough will easily rise in two hours. The dough will take longer to rise if the temperature in your house is a lot cooler.
Bake the pizza in a very hot oven and on a hot pizza stone to get the best rise out of this gluten free dough.
My sourdough crust has just a light tanginess to it. If you prefer to add to the tanginess of your dough, just feed the starter with warmer water. Around 82-89 °F(28-32 °C) and feed the starter after it has peaked.
Toppings
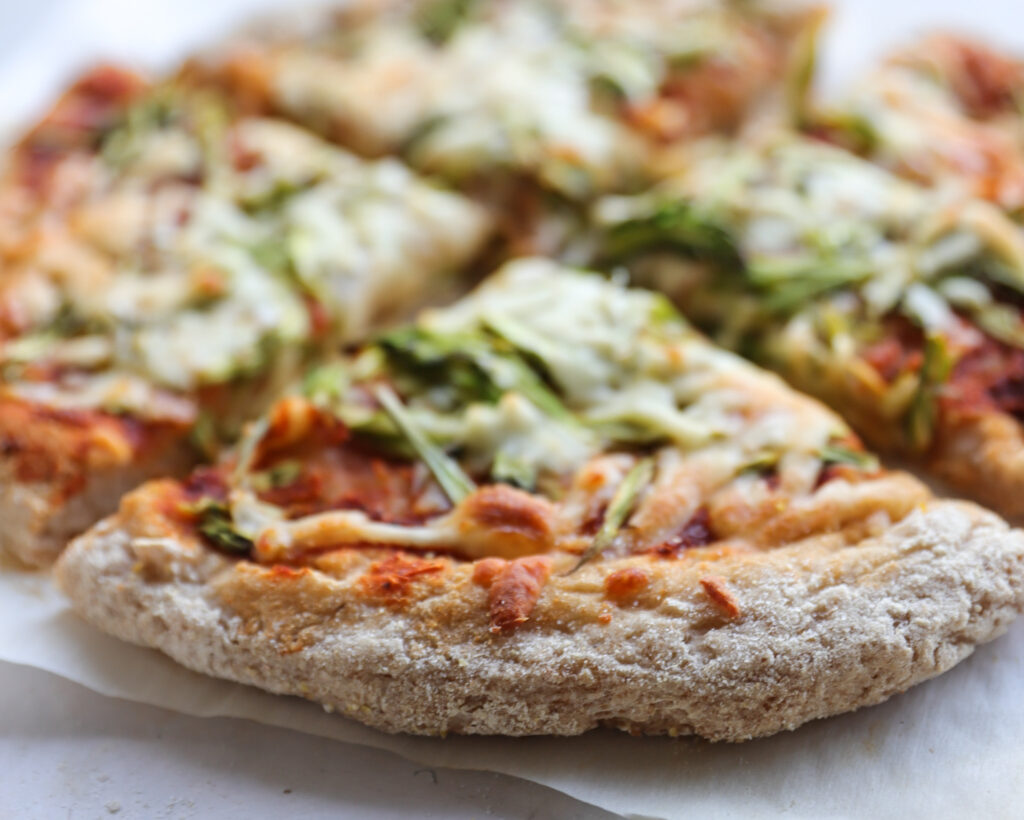
One of the pizzas I made was with mozzarella cheese and grated, fresh asparagus. Adding vegetables to pizzas is one of my favourite things to do and this was amazing! Firstly add 2 tablespoons of pizza sauce, then add a generous layer of cheese, before adding asparagus, and of course … more cheese because you just need more cheese! Right!
Such a great combination of flavours and I thoroughly enjoyed the change.
THE BEST PIZZA MAKING TOOLS
Parchment Paper: I always bake my pizzas and all my gluten free doughs on parchment paper. Parchment allows the delicate gf pizza dough to easily transfer to a hot pizza stone or cast iron pan.
A cast iron pan or pizza stone: Most gluten free doughs gets an amazing rise, after being placed onto a very hot pizza stone. It is worth the investment.
HOW TO MAKE THIS GLUTEN FREE PIZZA CRUST
- Feed your starter 2 to 6 hours before building the levain
- When the starter has reached its peak, then make the levain. Alternatively use fresh sourdough discard.
- Whisk together the levain, warm water and psyllium husk
- Add the rest of the ingredients and let the dough rest for 10 to 15 minutes
- Split the dough into two equal portions
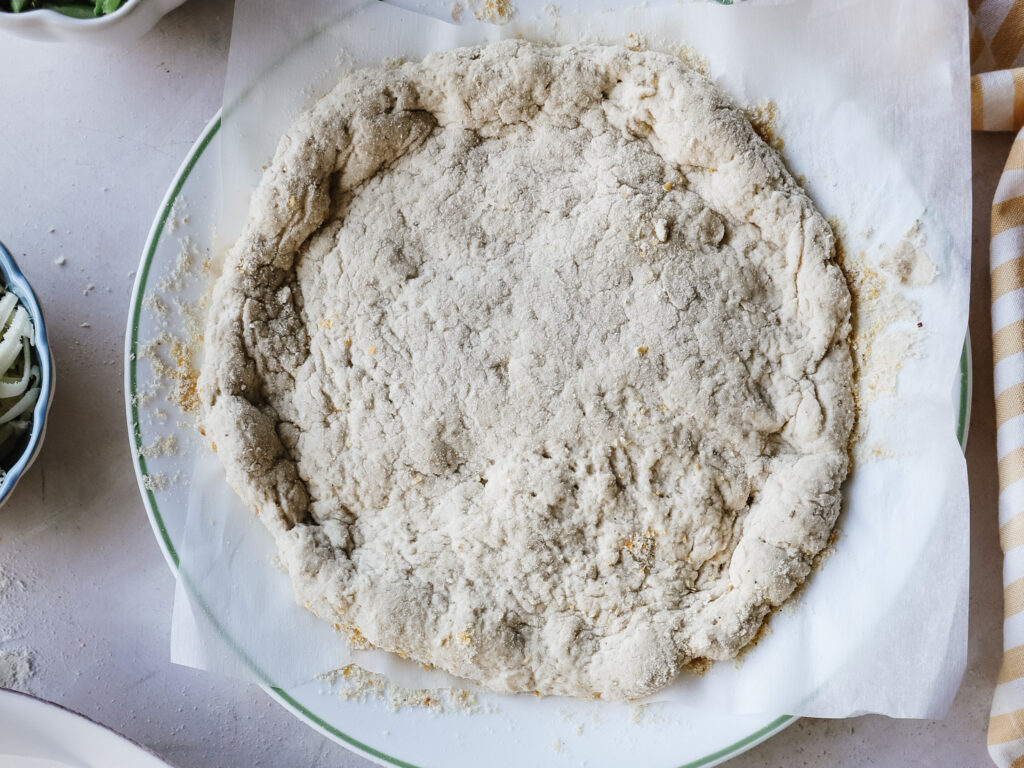
- Knead each pice of dough and shape it into a disk
- Roll out the dough on parchment paper, dusted with white rice flour. This is a sticky dough.
- First work the dough with wet hands and then use a little flour
- Make the dough the same day you want to bake it, or for an easy meal make the dough the day before.
- Let the dough rise for 2 or 3 hours before adding toppings and baking
With all of my recipes I prefer to use a kitchen scale for accuracy. Here’s the link to the scale that I use. There are many others available that are just as good and for a cheaper price. I have used my own gluten free flour blend in this recipe.The gluten free flours used in this recipe are brown rice flour, tapioca starch and quinoa flour.
Flour substitutes I have experimented with for this recipe
Brown rice flour – sorghum flour
Tapioca starch – potato or corn starch
Quinoa flour – oat flour
Gluten Free Pizza Crust
Ingredients
- 125 g active sourdough starter
- 250 g warm water
- 10 g olive oil
- 10 g whole psyllium husk
- 80 g brown rice flour
- 75 g tapioca starch
- 40 g quinoa flour
- 1 tsp salt to add with toppings
- extra brown rice flour for dusting and shaping.
Instructions
- Feed 25g of sourdough starter in the morning with 50g brown rice flour and 50 g of water. Leave it at room temperature for 4 to 6 hours to rise and reach a peak or rounded dome on top.
- Line a pizza stone with parchment paper and dust a little brown rice flour on top of the paper.
- Whisk the levain, water, oil and psyllium husk. Leave this mixture to gel while weighing out the flour.
- Add brown rice flour, tapioca starch and quinoa flour to the psyllium mixture and combine all the ingredients well. Mix by hand or use a kitchen mixer with a dough hook.
- Separate the dough into two equal portions and press out the dough into a flat disk using wet hands. Let the dough rest for 5 to 10 minutes and then finish shaping it on the parchment paper, with brown rice flour, using a rolling pin and your hands.
- Let the dough rise for two or three hours in a warm place. It is not necessary to cover the dough. as this will help it create a nice crust.
- Preheat the oven to 425°F (218°C) with the pizza stone or a cast iron pan on the middle rack of the oven.
- Add the pizza sauce, salt and any favourite toppings to the pizza base and then transfer the parchment paper and the pizza onto the hot pizza stone or pan.
- Bake for 25 to 30 minutes.
- Let the pizza cool for 10 minutes before cutting and devouring.
This is the most delicious pizza dough. Thank you!! It will be on rotation at our house. Leftovers were delicous (crust was still pliable). Shared 2 batches with my celiac friends.
Tips to share:
*cookie sheets worked great, just had to adjust the shape to fit
*dough made 2 large pizzas (enough for four people).
*rolled the dough quite thin – around 1/4 inch or 0.5 cm thick. Used silicone spatula to get it off parchment if it got stuck.
Thanks you so much! Great tips!