

Gluten free sourdough troubleshooting and what I have learned about baking this bread since I began this journey, nearly 10 years ago. When your bread is dense, gummy, over proofed, under proofed or the crust is too hard? Here’s how to turn your loaf into a fluffy, tender success.
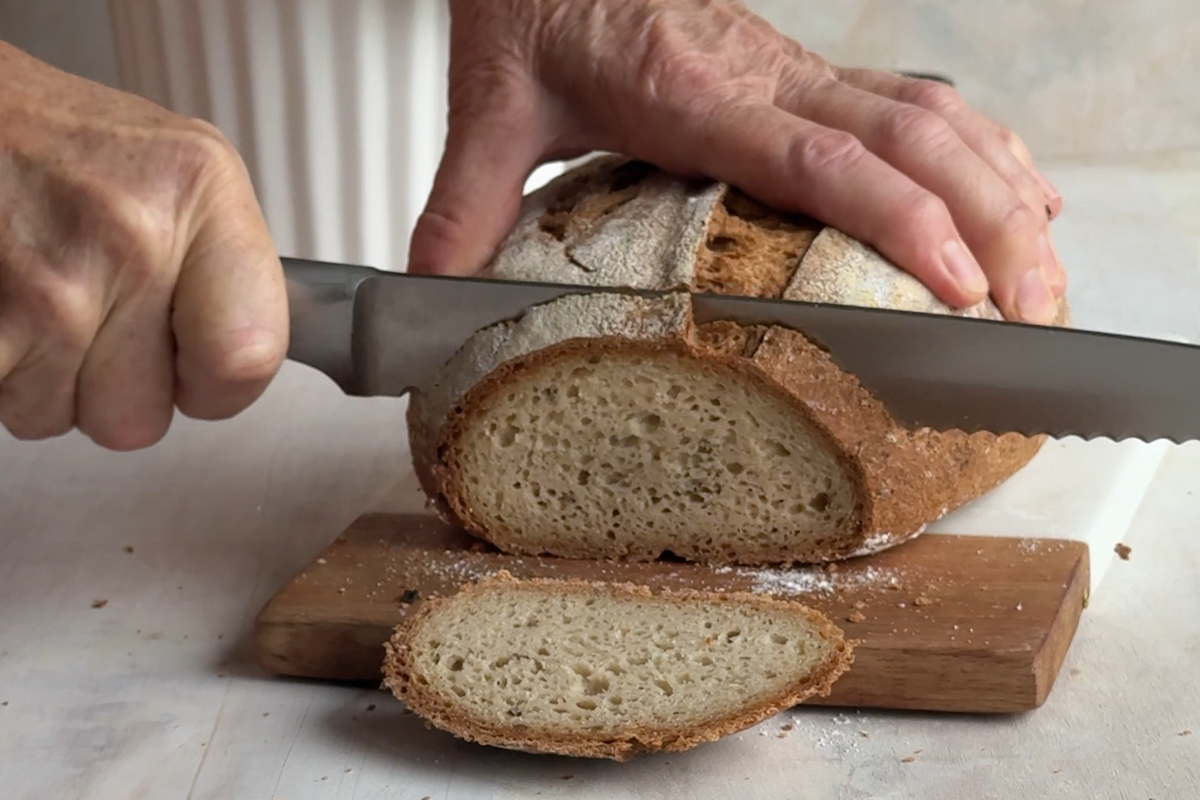
You followed the recipe, watched it rise…but the loaf came out dense and gummy. Don’t worry, you’re not alone! Here are some of the most common issues when it comes to gluten free sourdough troubleshooting!
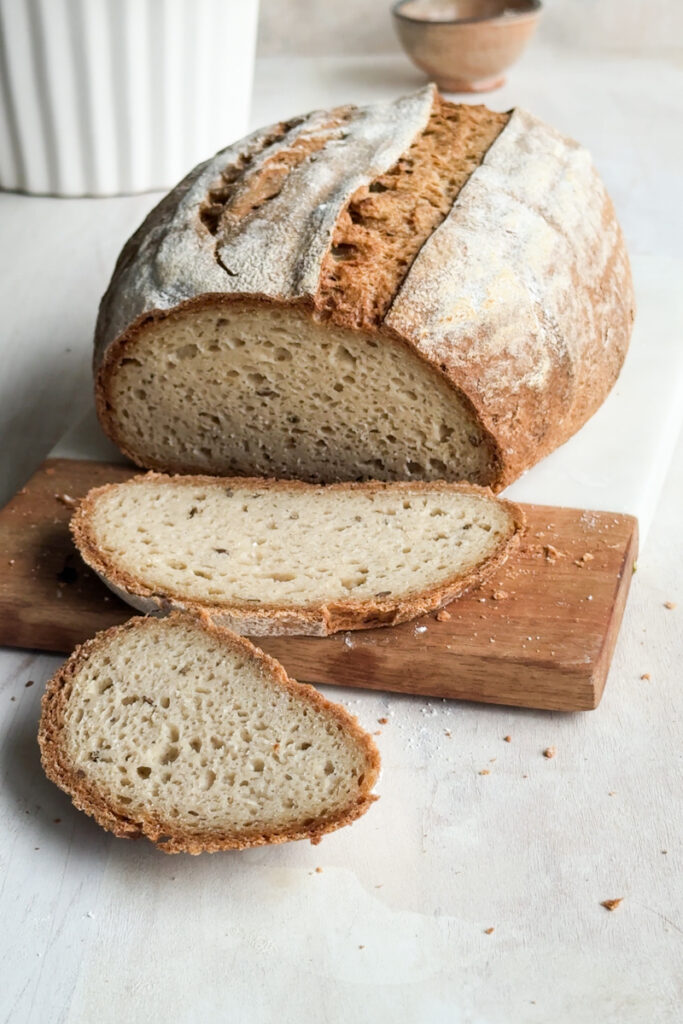
Gluten Free Sourdough Troubleshooting For A Dense Crumb
Gluten free flour blends matter – whole grains have the nutrition factor but you do need starches and psyllium husk for the structure. Although, I have made bread with zero starch.
Personally, I prefer a more whole grain flour blend, where starches are only about 35% of the total flour blend. The more starch, the more light and airy the crumb. Starches are also high in carbohydrates, with very little protein, fibre or micronutrients. A blend with a higher ratio of whole grains is healthier for you, but Its all about balance and what you prefer.
Hydration – different flour blends absorb water differently. I may use a finer flour blend than you and it will absorb more water and make a smoother dough. A courser flour will absorb less water and give a denser crumb. Tweak the hydration based on your flour blend at home. This may be as little as 20 to 30 grams of water at a time.
Too much psyllium husk – because psyllium absorbs moisture you may need to adjust this for your particular flour blend. My psyllium husk maybe finer than yours and therefore absorbs more water. Your psyllium husk may need adjusting, depending upon on the brand and texture you use.
Overproofing/underproofing – over proofing can happen quickly with gluten free flours. Especially, those with a lot of starches, which can cause the dough to collapse. Under proofing is also a common issue for a dense crumb. This is usually due to either a weak starter, or one that is used after it has peaked and collapsed.
Gummy Interior
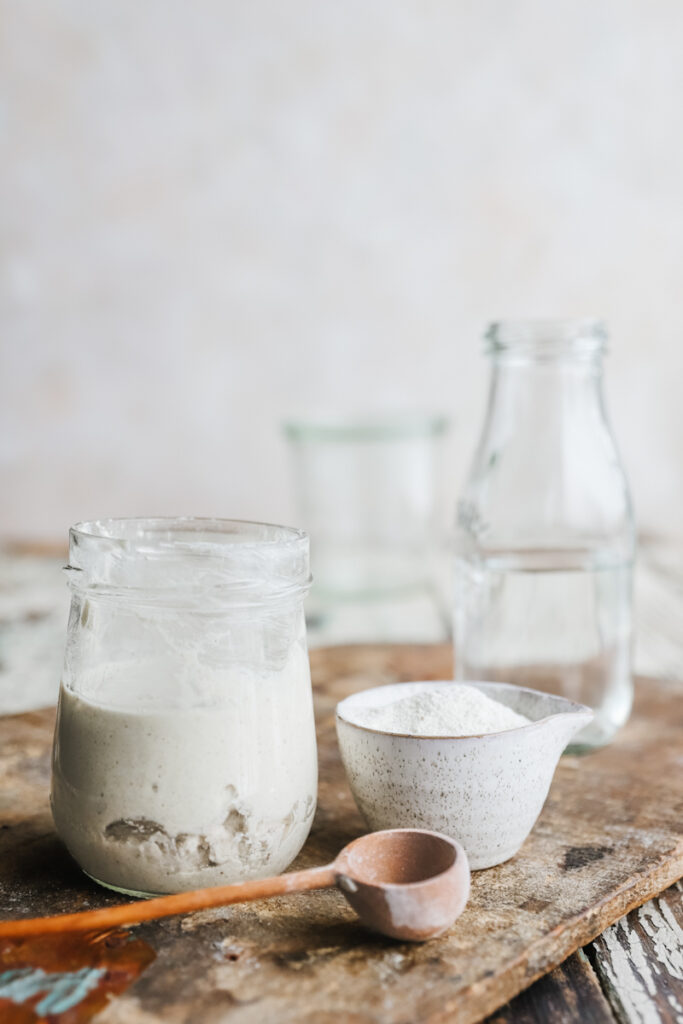
Gluten free sourdough starter is not active enough – maybe you just grew your own gluten free sourdough starter (recipe here)
Under proofed dough– a common cause for a gummy loaf is this, but it can also be from over proofing
Watch for – underbaking, too much water, and slicing too soon
Poor Rise
Starter strength – it should double or rise by at least 30% in 3–6 hrs, smell mildly tangy, and be at peak when mixed into the dough. If the starter is weak just keep feeding it more frequently to get it strong again.
Temperature matters – keep it warm (24–27°C/75-80°F) for the best rise. Use a seedling mat or the oven with the light on if it is cold in your kitchen.
At peak – make sure to make a levain when the starter has increased in size, has a dome on top which means it’s at its peak. This is the same for the levain. It is at its best at peak, or just before, when mixed into the dough and it has not collapsed and shrunk in size.
Don’t overhandle – since there’s no gluten and it is different to wheat dough. Use wet hands or lightly oiled hands to help shape the dough. There is no need for stretch and folds with gluten free sourdough. Just mix, shape, let it rise in a banneton or loaf pan. I like to use pans and banneton’s with high sides and ones that are not too wide. I use a 7 inch round banneton for my dough, because it pushes the dough up higher.
If You Would Like More Gluten Free Sourdough Starter Information:
The recipe for my Gluten Free Sourdough Starter is HERE
Link To My “Gluten Free Sourdough Baking” Cookbook on Amazon Canada
Try These troubleshooting Gluten Free Sourdough Tips
| Problem | Cause | Fix / Solution |
| Dense bread | Under-proofed dough; too much heavy flour; too much binder | Ensure dough rises well during bulk ferment; use a balanced flour blend, correct hydration and don’t underproof/overproof |
| Gummy inside | Too wet dough; under-baked; too much whole grain-heavy flour | Slightly reduce hydration; balance starch with whole grain flours; bake at high heat;dont undererproof |
| Hard/thick crust | High baking temp; lack of steam; overbaked | Start at high heat (425°F/ 218°C) with steam or covered; finish at lower temp; cool completely before slicing, wrap in tea towel while still warm |
| Poor rise | Weak starter; short proofing; cold environment, starter and/or levain not active and at peak | Feed starter regularly until active; allow enough bulk and final proof; ferment in a warm spot (24-27°C / 75-80°F) |
| Collapse after baking | Over-proofed; too wet; too many starches | Reduce proofing time; balance hydration; add structural binder (psyllium) |
| Holes or tunneling | Over-proofing | Mix gently; follow proofing guidelines and watch in hot weather |
| Using mostly starch flours | Not enough structure or nutrition value | Blend starches with whole grain flours; add psyllium for elasticity |
| Uncertain if fully baked | Hard to tell from look alone | Tap test: hollow sound; crust: slightly crisp |
| Skipping psyllium | No binder | Expect denser, more crumbly bread; psyllium improves structure and moisture retention |
| Flat Bread | This could be a weak starter, too much water or a larger than necessary banneton.. | If your dough grows in height then it’s not your starter. Try reducing water or use a smaller banneton |
| Dough did not rise in the oven after a long fridge fermentation | Make sure the dough is not over proofed before going into fridge and the time in there. | 12 to 48 hours is ok, although it may not rise as well in the oven after 24 hours. |
| Bread too gummy after slicing | Sliced too soon | Cool completely on a wire rack (at least 3 hours or overnight) |
| Inconsistent results | Inaccurate measuring and temperature fluctuations | Measuring ingredients is way more accurate and easy with a kitchen scale; adjust proofing times in hot (less time) or cold (more time) temperatures. |
Thanks for the troubleshooting tips. I have experienced many of these issues. After 2 years of using your sourdough cookbook, I am finally getting my bread perfected. I live in New Mexico at 7800 elevation, so I have added issues baking. I think my solution to my bread always being gummy, has been a hydration issue. I have made my starter with more water, does much better. Might you consider doing a video or posting photos on how much the dough should proof and rise? My favorite bread is the buckwheat.
I just wanted to let you know that I’ve been using your GF Sourdough Baking Book for about two years now and I just absolutely love it. Everything we make is a total hit!! We love your basic loaf and my lemon obsessed husband loves your lemon challah loaf. Thank you for putting such hard work into your recipes. I’m a good cook and can improvise and come up with new ideas but for the life of me I don’t understand baking the same way, I’m great at it-so long as I follow a recipe haha! I could never come up with all the fun recipes you have in the book, so just thank you thank you thank you!!
Thank you so much!
Mary
I have a really great GF sourdough recipe that worked perfectly until a few months ago.
Now I have bad tunneling and under the tunnel it’s super dense like unbaked.
I tried more and less moisture, more and less proofing, proofing in fridge and in oven proof. Nothing changes
Any input?
These are classic signs of over proofing!
Over proofing happens when gluten-free dough ferments too long, letting the gases rise and collect at the top while the weakened structure underneath collapses, leaving large tunnels and a dense, gummy crumb below.
It likely started happening because your starter became stronger or your environment warmed slightly, causing the dough to ferment faster than before, and once gluten-free dough passes its peak, changing the water amount won’t fix the tunneling because the starch structure has already weakened and can’t reset.
Try these adjustments, but not all at once.
– Reduce the bulk ferment time
– Bake when the dough is barely domed, not puffy. Earlier baking is better in this case.
– Reduce the starter by 10–20%, especially if it doubles quickly or smells sharp.
-adjust the flour. If there is a lot of starch, it will ferment more quickly